Numark NS7 II, the field manual
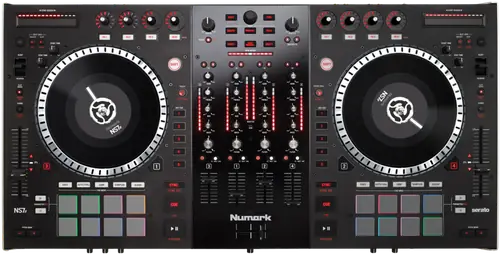
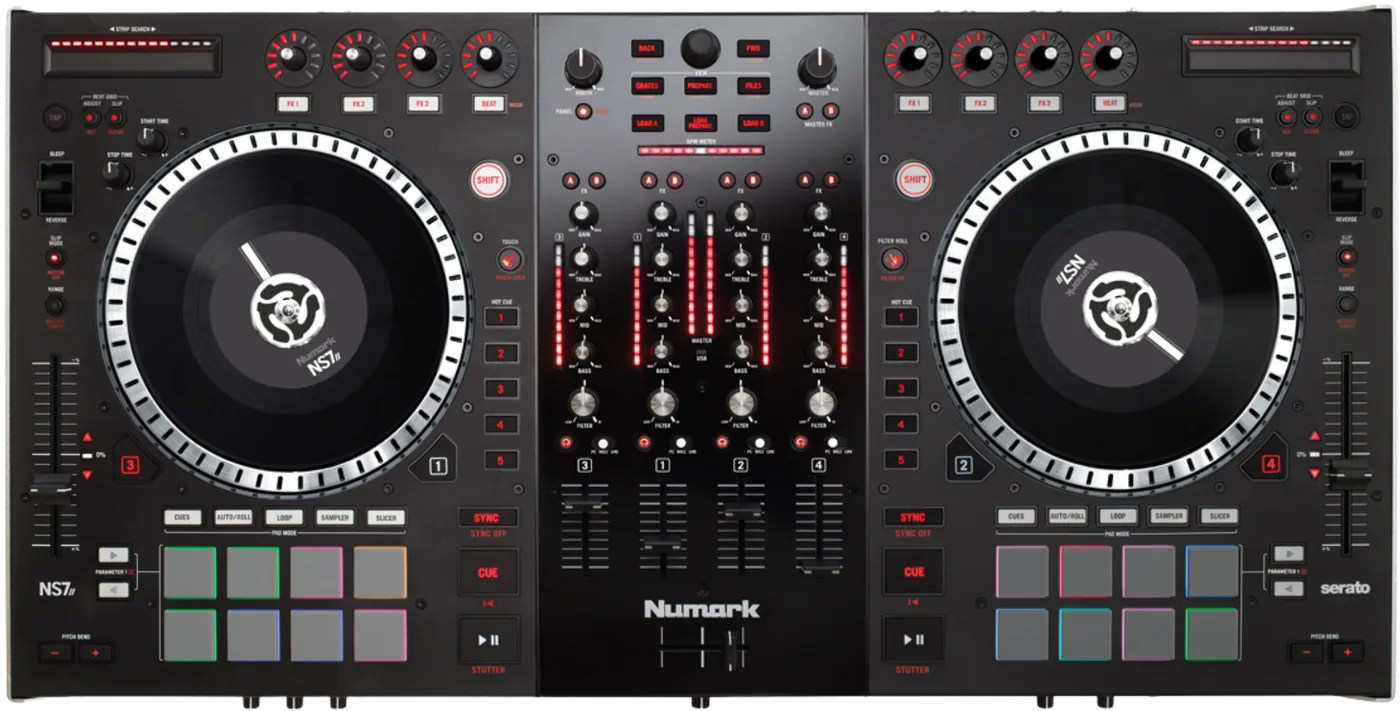
Booth briefing. The Numark NS7 II is a four channel Serato controller with two motorised platters, one per hardware deck, so each side of the unit is a spinning platter under Serato control. Four channels sit on two hardware decks, and the Layer control switches a deck between its software layers. Each channel has an Input Selector: set to PC, the channel's controls drive Serato, and set to Line, it takes an external source through the hardware. The guide is published in five languages, English and four translations.
When it goes wrong: The computer cannot see the controller No sound from the controller
Fast Lane
The five things that decide your gig
The five things on the Numark NS7 II that change what happens next, if you are reading this in the booth. All five are explained in full further down this page.
The control is called Layer. There is no Deck Select switch on the unit.
The control is called Layer. The English Takeover LEDs entry tells the reader to select the other deck with the Deck Select switch, and no button, switch or silkscreen anywhere on the unit carries that name: item 3 of the same English section defines the control as Layer, and the Spanish, French, Italian and German editions all name it correctly. This is the one place on this model where the four translations are the accurate text and the English is the slip, which is the reverse of the usual assumption, so an English reading DJ hunting for a Deck Select switch is looking for something that is not on the panel.
So the move is to reach for Layer and stop hunting. Nothing is missing from the panel and nothing has been removed from your unit.
No platter size, no torque figure, and no calibration procedure in the guide.
The guide gives no platter diameter, no torque figure, no start time and no stop time in seconds. Start Time and Stop Time are knobs beside the platter, described as controlling the rate at which the platter regains its normal playback speed and the rate at which it slows to a complete stop, with no numbers, no ranges and no factory positions. Torque is a two position rear panel switch, described only by feel: the high setting gives the heavier, stronger feel of modern turntables and the low setting is lighter and more graceful, the feel of a classic turntable. Which position the switch ships in is not stated.
There is no calibration procedure in this guide. The words calibrate and calibration appear zero times in the document, in any of its five languages, and there is no touch sensitivity adjustment, no sensor reset, no service mode and no power on button combination. The only platter adjustment described anywhere is the two position torque switch. Numark do publish separate NS7 II calibration guidance on their support site, and the guide never mentions that it exists, so an owner working from the manual alone has no way to learn there is a procedure. Anything about how that procedure runs has to be taken from the support article and credited to it, never to this guide.
For a turntable, use the input pair that has a Line and Phono switch beside it.
Use the input pair that has a Line and Phono switch beside it for a turntable. The Spanish edition describes the Line and Phono inputs as line only: it retitles rear panel item 7 as Entradas de linea and gives it word for word the same body text as item 9, the genuinely line only pair, so the sentence saying those inputs accept both line and phono level signals is gone, while the very next entry still tells the reader to set a Phono switch. Both NS7 Spanish editions carry a version of this, and the NS7III Spanish keeps the correct title while losing the same sentence.
Set the switch to match the device, and read the English entry for those two pairs if the Spanish page in front of you describes both of them the same way.
Connect everything first, then power the unit on, then the amplifiers.
Connect your input devices, then power the unit on, then power on the amplifiers. Numark print that order twice in the English edition, in the setup steps as one, two, three (input sources, then NS7II, then output devices) and again in the rear panel Power Switch entry. Shutting down runs the other way: amplifiers off before the unit. The mains cable goes into the unit while it is switched off and then into the outlet.
The Spanish rear panel entry says to power the unit on after DISCONNECTING all the input devices, where the English says after they have been connected. The NS7III Spanish gets the same sentence right, which places this one in this document rather than in a house style. This site follows the English: connect first, then power on. It is a documentation slip, and worth knowing about before anyone sets the unit up from the Spanish page.
A channel strip that has gone quiet to Serato is usually its Input Selector.
Check the Input Selector before you suspect the hardware. Numark state that a channel’s controls will only send MIDI information when its Input Selector is set to PC, so a channel sitting on Line or Mic 2 has a gain, EQ, filter, fader and PFL that send nothing to Serato at all. It is the ordinary explanation for a channel strip that appears to have died, and it comes back the moment the selector goes back to PC.
Each channel Input Selector has three positions and no off: PC for the software layer, Line for a device on that channel’s Line input, and Mic 2 for the rear panel microphone. Numark add that the rear panel Line and Phono switches have to be set to match, and warn that setting more than one channel’s selector to Mic 2 can cause feedback or distortion.
What to watch for
How this page reads one manual printed in five languages
The NS7 II guide is a single PDF carrying English, Spanish, French, Italian and German, so this page reads the editions against each other and records where they part company. Where this site records a difference between the English and the Spanish of a Numark manual, it is recording a documentation slip and nothing more. One PDF carrying five languages is translated and laid out by different people under different deadlines, and the differences below are different in every document, which is what ordinary editing slips look like. None of it suggests a manufacturer trying to mislead anyone, and this site does not read it that way.
Everything below therefore says what to DO first and what the documents print second. Where two editions disagree, this site follows the English unless the panel itself settles it, and on this model there is one point where the panel settles it the other way.
The two input pairs, and how each edition describes them
Only one of the two rear input pairs on an NS7 II takes a turntable, and the switch beside it is how you tell. Use the input pair that has a Line and Phono switch beside it for a turntable. The Spanish edition describes the Line and Phono inputs as line only: it retitles rear panel item 7 as Entradas de linea and gives it word for word the same body text as item 9, the genuinely line only pair, so the sentence saying those inputs accept both line and phono level signals is gone, while the very next entry still tells the reader to set a Phono switch. Both NS7 Spanish editions carry a version of this, and the NS7III Spanish keeps the correct title while losing the same sentence.
The Spanish editions also drop things. The NS6 II Spanish omits the sentence explaining that a channel stops sending MIDI when its input selector is on Line, which is the single most useful line in the English guide. Both NS7 Spanish editions describe the Line and Phono inputs as line only, while the neighbouring entry still tells the reader to set a Phono switch. And the MixTrack Pro FX Spanish prints one pad mode twice and loses another entirely.
Where else the five editions part company
Five smaller differences run through the NS7 II Spanish edition, and none of them is a fault of the machine. Five smaller differences run through the Spanish edition. Items 37 and 38 are swapped, so Spanish 37 is the Pitch Fader and 38 the Takeover LEDs, against the same numbered artwork the English section uses. The velocity note becomes solo en algunos modelos, in certain MODELS only, rather than in certain modes only. The LED Meters entry adds de la salida de programa, turning a channel meter into a program output meter that the English never claims, which matters when gain staging. The Multi-FX sentence inside the FX knobs entry says the buttons control the wet and dry balance where the English says the knobs. And Start Time is described as controlling the time rather than the rate at which the platter regains speed, while the two Stop Time entries agree with each other.
All three Spanish EQ entries drop the EQ kill sentence, while the Spanish Touch Mode entry still tells the reader that Shift plus Touch Mode extends touch control to the EQ knobs. The Spanish edition therefore explains how to switch on a behaviour that it never describes anywhere, and the same omission is in the NS7III Spanish.
The specification table is published in English only. There is no Spanish, French, Italian or German appendix, so a reader working from any of those four editions gets no frequency response, no signal to noise, no THD, no dimensions and no weight for this unit.
Nothing in the guide can be dated to a release
The NS7 II guide carries its own version number and no product version of any kind. The words firmware and update appear zero times in this guide, in any of its five languages. There is no update procedure, no version number, no serial number range and no hardware revision, so nothing in the document can be dated to a release and nothing in it tells an owner that a firmware exists. The only version the document carries is its own, Manual Version 1.3. What it gives instead is a driver download for the computer.
Numark lead the setup with an instruction in capitals to install the drivers before installing the software, and scope those drivers to no platform at all: they are downloaded from numark.com/ns7ii by every user, and the reader is told they will be asked to connect the unit during installation. System requirements are not in the guide, which sends the reader to numark.com/ns7ii for them and names no macOS or Windows version anywhere.
What the guide does not answer
On the NS7 II the published record stops short of the panel in a few familiar places. The guide contains no troubleshooting section, beyond a note that a low hum or buzz can mean the turntables are not grounded. There is no safety or warranty text either: it is deferred to a separate Safety and Warranty manual.
None of the seven user guides states what the product is. There is no sentence in any of them calling the unit a controller, a mixer or a standalone system. The SCRATCH guide never uses the word mixer at all, and the NS6 II guide has no introduction section whatsoever.
None of the seven guides contains safety or warranty text. All seven defer it to a separate Safety and Warranty manual, so the document a DJ keeps is not the one carrying the warnings.
Compatibility
What Serato unlock, and what timecode still costs
Serato state that this hardware unlocks Serato DJ Pro for free when it is plugged into the software.
On timecode Serato are explicit where the guide is silent: DVS is not included, and using control vinyl or control CDs needs the Serato DVS expansion pack.
Discontinued, and the configuration that goes with that
Serato list the NS7 II as discontinued hardware and warn that drivers and firmware updates for discontinued hardware come from the manufacturer and are not updated. They give the last supported configuration as macOS 10.12 Sierra or Windows 10, with Serato DJ Pro version 2.3.1.
That is the fact to carry into a second hand listing. The machine is not broken and it is not current either: a modern laptop is outside the last configuration Serato support for it, and the version they name is several generations behind the one a new buyer would install.
The guide makes no timecode claim
An NS7 II rear panel looks timecode ready, and the document in the box never uses the word. The guide never mentions DVS. The words DVS, timecode, control record and control vinyl appear nowhere in it, in any of the five languages. The rear panel carries phono inputs, a grounding terminal and Line and Phono switches, so the unit looks timecode ready, and Numark describe those inputs only as places for audio sources and for phono level turntables. Whatever the software supports, this document makes no timecode claim, so it is not the paper to promise a client DVS on.
Does it pass audio with no computer?
This is the question people ask about every NS7 II on a second hand listing, and the guide does not answer it. Whether the unit passes audio with no computer is NOT STATED. The word standalone never appears, there is no media slot of any kind, no USB host port and no internal storage, and the USB port is described only as sending and receiving audio and control information from a connected computer. Every playback control is described as controlling something in the software. The Line, Phono and microphone inputs are analogue paths and the power up order lists the unit between input sources and output devices, but no sentence in the guide says whether the unit works without a computer.
This site will not settle it by inference either. What can be said is what the machine carries: analogue inputs, a mixer, and no media slot, no screen and no library.
Features explained
The Layer control, and the name to ignore
On the NS7 II the control that swaps a deck between its two software layers has one name on the panel and two in the paperwork. The control is called Layer. The English Takeover LEDs entry tells the reader to select the other deck with the Deck Select switch, and no button, switch or silkscreen anywhere on the unit carries that name: item 3 of the same English section defines the control as Layer, and the Spanish, French, Italian and German editions all name it correctly. This is the one place on this model where the four translations are the accurate text and the English is the slip, which is the reverse of the usual assumption, so an English reading DJ hunting for a Deck Select switch is looking for something that is not on the panel.
The Pitch Fader has an LED beside it that lights at 0%, and the Range button sets ±8%, ±16% and ±50%. Shift plus that button locks the track’s pitch to its original key while the tempo stays where the fader puts it. The Takeover LEDs handle a mismatch after a layer change: move the fader the way the arrow points until the light goes out and it has control again.
The document spells the model NS7II throughout, as one word with no space, in English and in Spanish. The spaced form NS7 II appears six times and only inside the German section, NS7-II appears nowhere, and Numark give the support and driver address as numark.com/ns7ii.
The Input Selector, and the sentence worth more than the rest of the guide
This is the first thing to check on an NS7 II channel that has stopped talking to the software. Check the Input Selector before you suspect the hardware. Numark state that a channel’s controls will only send MIDI information when its Input Selector is set to PC, so a channel sitting on Line or Mic 2 has a gain, EQ, filter, fader and PFL that send nothing to Serato at all. It is the ordinary explanation for a channel strip that appears to have died, and it comes back the moment the selector goes back to PC.
Each channel Input Selector has three positions and no off: PC for the software layer, Line for a device on that channel’s Line input, and Mic 2 for the rear panel microphone. Numark add that the rear panel Line and Phono switches have to be set to match, and warn that setting more than one channel’s selector to Mic 2 can cause feedback or distortion.
Numark print it as a note rather than as a warning, which is the only reason it surprises anyone. Learn the three positions once and the whole class of fault stops being mysterious.
The platters, the torque switch and the numbers nobody published
The NS7 II is bought for its platters, and the platters are what the guide says least about. The guide gives no platter diameter, no torque figure, no start time and no stop time in seconds. Start Time and Stop Time are knobs beside the platter, described as controlling the rate at which the platter regains its normal playback speed and the rate at which it slows to a complete stop, with no numbers, no ranges and no factory positions. Torque is a two position rear panel switch, described only by feel: the high setting gives the heavier, stronger feel of modern turntables and the low setting is lighter and more graceful, the feel of a classic turntable. Which position the switch ships in is not stated.
The platters ship unassembled and the owner fits them. The box carries two platter assemblies, each an aluminium platter, a slipmat, a vinyl and a 45 RPM adapter already attached to the vinyl, plus a spindle screw and an allen wrench. Numark have you align the pins under the platter with the holes in the motor, lay the slipmat on the platter and the vinyl over the slipmat, then lock the 45 adapter to the spindle with the allen wrench, so the vinyl is screwed down rather than free floating.
Shift plus the Slip Mode button activates or deactivates that platter’s motor, and Numark state that it does not affect the track’s playback. Which state the motor is in at power up, and whether motor off survives a power cycle, are not stated.
Set the two knobs by ear against a track you know, and note where you left them, because there is no printed reference position to return to.
The pads, the two dead ones and the Beat Grid buttons beside them
The NS7 II carries five pad mode buttons and ten modes, so the pad in front of you is doing one of ten things. Five pad mode buttons, each toggling two modes across eight pads per deck: Cues gives Hot Cue and Hot Cue Auto-Loop, Auto and Roll gives Auto-Loop and Loop Roll, Loop gives two identical banks of Manual Loop Mode, Sampler gives Sample Player and Sample Velocity Trigger, and Slicer gives Slicer and Slicer Loop. Numark state that when a mode button is unlit the first press always selects the first of its two modes, and that Slicer and Slicer Loop need a track with a Beat Grid set.
Sample Player Mode uses six of the eight pads. Numark’s own diagram for that mode labels pads 7 and 8 no function, so a rehearsed eight pad sample layout meets two pads that do nothing. Velocity sensitivity is described as applying in certain modes only, and the one mode Numark ever name as velocity sensitive is Sample Velocity Trigger.
Three Beat Grid operations sit within one button of each other and none asks for confirmation. Slip / Clear held with a hand on the platter shifts the whole grid, Shift plus that button deletes the grid entirely, and Adjust / Set warps the grid and, as Numark state, changes the track’s BPM. Both are hold and turn gestures on adjacent buttons, and the result lands in the Serato library rather than only in that set.
Touch Mode, which makes a knob audible before you turn it
Touch Mode changes what a hand on an NS7 II knob does, and there is nothing on the panel to read the state off. Touching a knob can change the audio. Numark state that with Touch Mode activated, touching the Channel Treble, Mid or Bass knob mutes that channel’s frequencies as an EQ kill, and that these functions are momentary rather than latching. Touch Mode on its own covers the three FX knobs, where touching FX 1 turns its effect on and releasing it turns the effect off, and Shift plus Touch Mode extends the same behaviour to the EQ knobs. There is no latched state to read off the panel, so reaching over to see where a knob sits will make an audible change while the mode is on.
Bleep and Reverse, and the difference you cannot hear
One switch on the NS7 II holds both functions, and they are identical to the ear while engaged. Bleep and Reverse are two positions of one switch and they sound the same while engaged. Numark state that returning the switch from Reverse resumes normal playback from wherever the audio pointer stopped, while returning it from Bleep resumes from where the track would have been if the function had never been engaged. You cannot hear which one you chose until you let go, so test the length of both before either is needed in a set.
Connections and setup
What goes in, and where each microphone ends up
The NS7 II has two kinds of line level input and two microphone inputs that behave nothing like each other. Line and Phono RCA inputs with a Line and Phono switch and a grounding terminal, a second and separate pair of Line only RCA inputs, one microphone on a 6.35 mm jack on the front panel with its own on and off switch, gain, bass and treble, and a second microphone on a 6.35 mm jack on the rear that takes over a mixer channel through that channel’s Input Selector. How many pairs there are of each input, and which channel each pair feeds, is not stated. There is no XLR microphone input and no phantom power statement.
Numark state that the front panel Mic 1 signal is routed directly to the Program Mix and Cue Mix, so it has no channel fader, no crossfader assign and no way out of the headphone cue. Mic 2 is the opposite: it takes a whole mixer channel and gets that channel’s strip, which is why Numark warn against setting more than one channel to it.
What comes out, and the two controls on the front panel
The NS7 II gives an engineer a balanced feed and gives the booth an unbalanced one. A balanced XLR master, an unbalanced RCA master, an unbalanced RCA booth, and headphones on 6.35 mm and 3.5 mm on the front panel with Split Cue and Cue Blend. There is no balanced booth output, no digital output and no record output. The rear panel entries call the level controls the Master knob and the Booth knob, while the top panel list names them Master Volume and Booth/Zone Volume.
Per channel Crossfader Assign switches with three positions, A, B or centre Off, and Numark state that the centre position bypasses the crossfader and sends that channel straight to the Program Mix. The curve is set by a Crossfader Slope knob, turned left for a smooth fade and right for a sharp cut, and Numark recommend the centre position as a typical setting for club performances. Both controls are on the FRONT panel rather than the top surface, so they cannot be reached with the front of a coffin case closed. Set them before installing.
The crossfader entry is one sentence about blending audio between the channels assigned to each side, and nothing else is published. No fader type (magnetic, contactless, optical or carbon), no brand, no part number, no cut-in, no cut lag, no tension, no replacement procedure and no statement of whether the fader is user replaceable. The specification table has no crossfader row of any kind, and there is no fader calibration in the document for the crossfader, the channel faders or the pitch faders.
Mains, the fan and a specification row that is not there
The NS7 II takes an IEC mains cable and runs a cooling fan, and the table at the back of the guide has nothing to say about either. The specification table gives no power figure of any kind: no voltage, no frequency and no wattage, on a unit with an IEC mains inlet and an active cooling fan. Numark ask only that the vent in front of the fan is kept clear and that the unit has air flow to all ventilation ports, especially in a case. The Spanish rear panel entry calls the included part a power adapter where the English calls it a power cable, and both box lists agree that the part is an IEC mains cable.
Connect your input devices, then power the unit on, then power on the amplifiers. Numark print that order twice in the English edition, in the setup steps as one, two, three (input sources, then NS7II, then output devices) and again in the rear panel Power Switch entry. Shutting down runs the other way: amplifiers off before the unit. The mains cable goes into the unit while it is switched off and then into the outlet.
The power on order, and the entry that prints it the other way round
Set an NS7 II up in this order and nothing on the page below can catch you out. Connect your input devices, then power the unit on, then power on the amplifiers. Numark print that order twice in the English edition, in the setup steps as one, two, three (input sources, then NS7II, then output devices) and again in the rear panel Power Switch entry. Shutting down runs the other way: amplifiers off before the unit. The mains cable goes into the unit while it is switched off and then into the outlet.
The Spanish rear panel entry says to power the unit on after DISCONNECTING all the input devices, where the English says after they have been connected. The NS7III Spanish gets the same sentence right, which places this one in this document rather than in a house style. This site follows the English: connect first, then power on. It is a documentation slip, and worth knowing about before anyone sets the unit up from the Spanish page.
On four of these seven models the Spanish edition of the manual differs from the English in a way that changes what a DJ would do. Two of them reverse an instruction outright: the NS6 II and the NS7 II Spanish rear panels say to power the unit on after DISCONNECTING the input devices, where the English says after connecting them, and the NS6 II Spanish contradicts its own setup section a dozen pages earlier. Where the two disagree, the English is the edition this site follows.
Calibration, and the document it has to come from
If an NS7 II platter needs adjusting, work from Numark's support article for this model and not from the manual in the box. There is no calibration procedure in this guide. The words calibrate and calibration appear zero times in the document, in any of its five languages, and there is no touch sensitivity adjustment, no sensor reset, no service mode and no power on button combination. The only platter adjustment described anywhere is the two position torque switch. Numark do publish separate NS7 II calibration guidance on their support site, and the guide never mentions that it exists, so an owner working from the manual alone has no way to learn there is a procedure. Anything about how that procedure runs has to be taken from the support article and credited to it, never to this guide.
Numark publish a support knowledge base with per-model articles, and on several points it answers what the manual does not. Coverage is uneven: the NS7 II, the NS7 III, the SCRATCH and the Mixstream family have articles, and no model-specific article could be found for the MixTrack Platinum FX, the MixTrack Pro FX or the NS6 II, checked 2026-09-06.
Firmware, drivers and manuals
Official downloads and documents
Go to Numark for the files themselves. We link their pages instead of hosting a copy, because a manual copied here is a snapshot of release day and theirs is the one that stays current.
Manuals. Official Numark manual page →
Broken link? Let us know and we'll fix it.
Frequently asked questions
What is it, and why does the guide not say?
A four channel Serato DJ controller with two motorised platters, four software layers and a built in mixer. The guide itself never says so: it has no introduction paragraph, no product class sentence and no prose statement of the channel count. The nearest thing to a count is a bracket inside the FX Assign entry, where Numark write that each effect can be applied to any or all of the four channels. The words motorised and turntable are never used of the unit itself.
The guide names the software Serato DJ, and the strings Serato DJ Pro, Serato DJ Lite and Serato DJ Intro appear nowhere in the document. The box lists Serato DJ software as a download with no card, and the guide never mentions a serial number, a licence, an activation or a registration step, so whether the hardware unlocks anything and whether a licence is included are not stated. No paid Serato expansion is named anywhere.
How big is it, what does it weigh, and how does the table read?
The English appendix gives signal to noise for the USB path and for the analogue path, THD plus N, channel separation and frequency response per output, plus THD figures for both microphones and for the phono input. Frequency response is given as 20 Hz to 20 kHz, the converters as 44.1 kHz at 24-bit, and the assembled unit as 762 by 405 by 107 mm and 15.3 kg, which Numark also print as 30 by 15.9 by 4.2 inches and 33.7 lbs.
The weight row is headed NS7II only, with assembled and mounted platters, so 15.3 kg is what you lift with the platters, slipmats and vinyl fitted. The platters ship separately in the box, and neither a bare unit weight nor a boxed weight is given anywhere, so there is nothing to subtract when checking a flight case against an airline limit.
Three rows are worth reading twice. Both frequency response figures carry a plus tolerance and no minus tolerance, printed as plus 0.2 dB and plus 0.5 dB, so how far the response may fall is unspecified and the figure cannot be compared like for like against a mixer quoted with a plus and minus tolerance. The codec dynamic range is printed as 114 dB with no greater than sign while every neighbouring row in the same block carries one, and the NS7 III table prints that same row as greater than 114 dB. And the imperial and metric dimensions do not convert to each other: 15.9 inches is 403.9 mm against the printed 405, and 4.2 inches is 106.7 mm against the printed 107.
This one or the NS7 III?
What this generation has that the NS7 III does not: a printed User Guide in the box rather than a download, drivers for all users rather than Windows only, the instruction to install the drivers before the software, a product specific support and driver address at numark.com/ns7ii rather than a bare numark.com, a booth control named Booth/Zone Volume rather than Booth Volume, Manual Loop Mode in place of the III’s Saved Loop Mode, a sampler pad diagram that labels its two unused pads, and a sampler colour legend for assigned and playing pads. What the III adds, including its detachable three screen display, is set out on the NS7 III page.
One caution on comparing the two specification tables directly. The weight printed here is the assembled figure described above, with the platters, slipmats and vinyl fitted, and no bare or boxed figure is published anywhere in this document, so there is nothing in it to subtract before setting the number beside another table.
What comes in the box?
The unit, two platter assemblies, an IEC power cable, a USB cable, a spindle screw, an allen wrench, the Serato DJ software as a download, a Quickstart Guide, a printed User Guide and a separate Safety and Warranty manual. Numark note that anything shown in the connection diagram but not on that list is sold separately.
Playing soon and it is not working?
Emergency Mode walks you through the checks in order, and it works with no signal once you have opened it.
Start Emergency ModeKeep the Emergency Card
We will email you the printable PDF so it is on your phone before the next dark booth. Occasional notes that save gigs. No spam, unsubscribe in one click.
Registering is free and counts everywhere on Save My Gig. We send a confirmation email first. Your address is stored with Brevo, our email provider. Unsubscribe any time. Privacy