

PLX-1000, the field manual
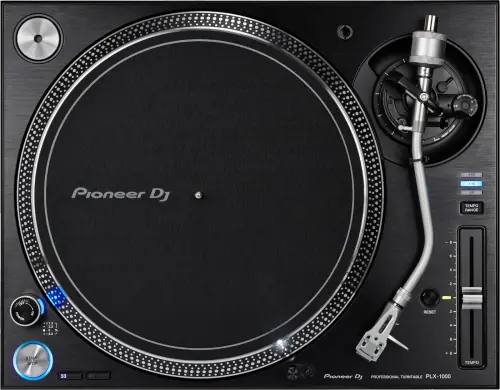
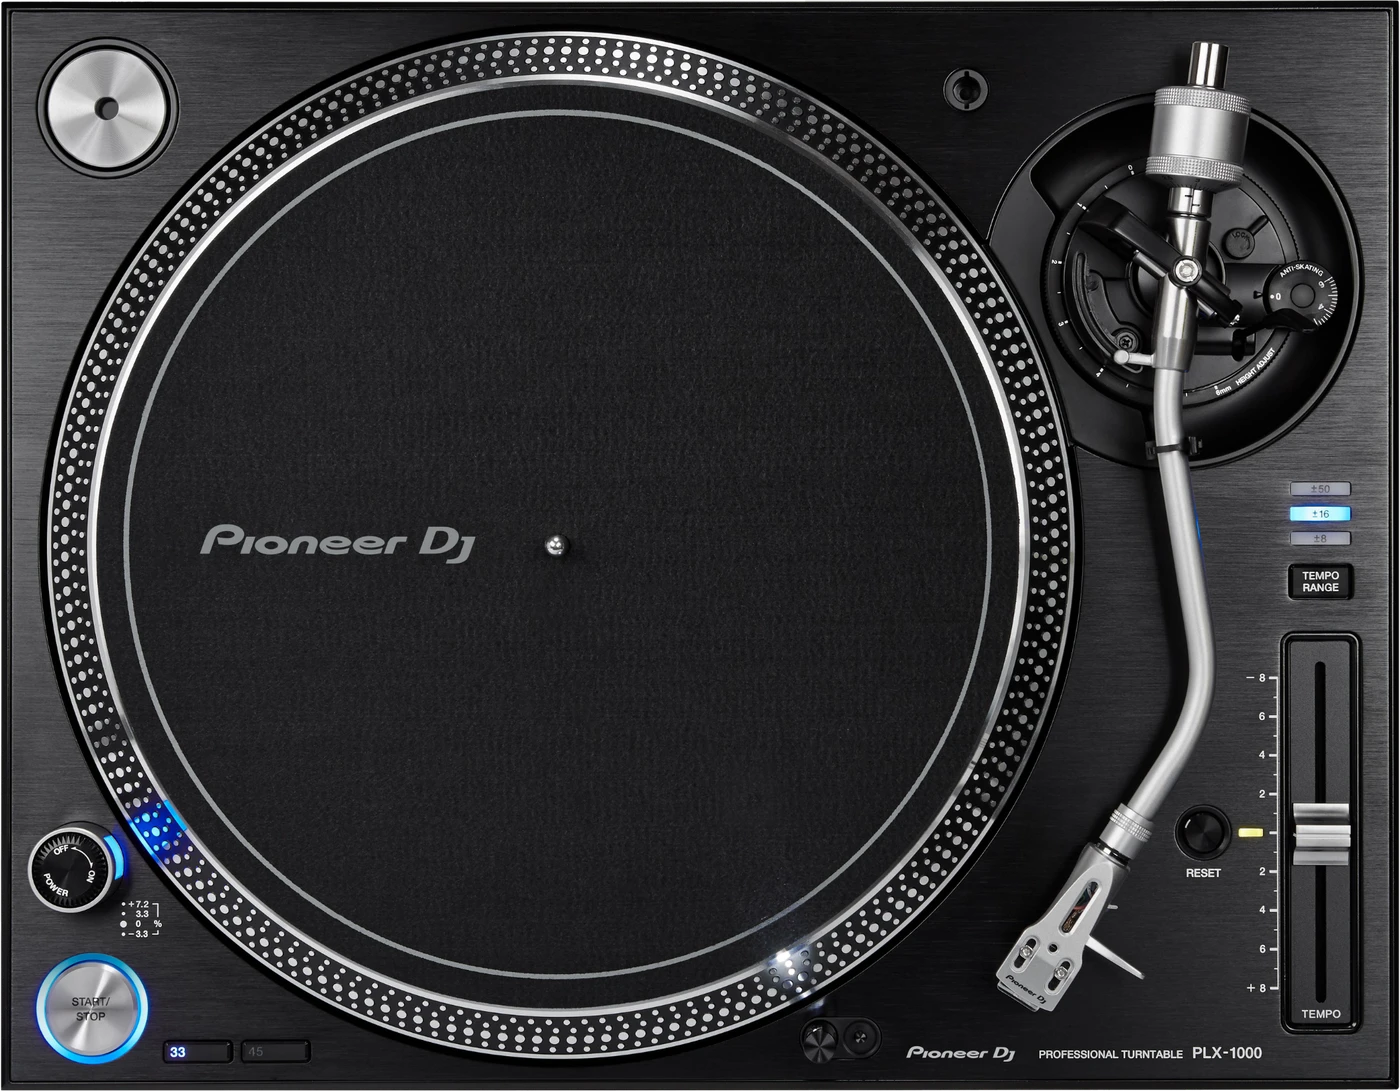
Booth briefing. The PLX-1000 is a fully analog direct-drive turntable with no firmware and no digital control path, so nothing on it updates or syncs. Pitch runs ±8%, ±16%, ±50%, with instant reset to 0%, at 33⅓ and 45 rpm. No cartridge is included: you supply and mount your own before it plays a record. Output is PHONO OUT (gold-plated RCA) and a SIGNAL GND terminal, no built-in phono equalizer, so the mixer needs a phono input or the signal arrives thin and bassless.
When it goes wrong: A turntable that hums
Fast Lane
The five things that decide your gig
The five things on the PLX-1000 that change what happens next, if you are reading this in the booth. All five are explained in full further down this page.
No cartridge in the box. It arrives incomplete on purpose.
A turntable with no cartridge makes no sound, and this one ships without one because the choice is yours.
The arm takes a cartridge of 2.5 g to 12 g, mounting screws and nuts included, and the shell weight and sub weight in the box are what widen that window.
No built-in phono equalizer. It needs a phono input.
Output is PHONO OUT (gold-plated RCA) and a SIGNAL GND terminal, no built-in phono equalizer.
Into a LINE input it will be thin and quiet, which reads as a broken deck and is a patching mistake.
A hum is almost always the ground wire, not the deck.
The manual is blunt about it: "Make sure to connect the ground wire. If the unit is not properly grounded, a power hum (humming sound) occurs."
Thirty seconds at setup, and it removes an entire category of soundcheck panic.
Torque is 4.5 kg-cm or more, with pitch at ±8%, ±16%, ±50%, with instant reset to 0%, at 33⅓ and 45 rpm.
Drive is servo-type direct drive, 3-phase brushless DC motor, so it reaches speed fast and holds it under a hand.
The ±50% range is the one that surprises people arriving from decks that stop at ±8%.
It has no firmware, so there is no version to read.
Nothing here updates, which means nothing here can be fixed by an update either.
Every fault on this deck is mechanical, electrical or a patching mistake, and that narrows the search usefully.
If something goes wrong
There is a hum in the system and it will not go away
Short answer. The PLX-1000 rear panel carries two separate connections for a reason: PHONO OUT for the audio signal and a SIGNAL GND terminal for earth. Check the ground first, because the manual states the consequence directly under both of its connection diagrams: "Make sure to connect the ground wire. If the unit is not properly grounded, a power hum (humming sound) occurs." The troubleshooting table asks the same question of a humming deck, and its remedy is one line long, connect the ground wire properly.
Why this happens. A phono cartridge outputs only a few millivolts, and the mixer's phono stage applies a large amount of gain to bring that up to a usable level. That gain is applied to everything on the input, including any mains-frequency noise the turntable's chassis has picked up. A solid ground gives that noise a path out; without one the chassis floats and the hum is being amplified by the same stage as the music, which is why turning things down does not fix it.
Fix it now. Get a wire from the SIGNAL GND terminal onto the mixer's ground post, tightened rather than just looped on. If the hum survives with a good connection at both ends, look at what is lying near the leads next. The manual's second cause for a humming deck is an electric device such as a fluorescent lamp or its power cord near the connection cord, which the manual says to place as far away as possible, which in a booth is usually a power brick or an IEC lead across the phono cable. Moving it takes a second.
Avoid it next time. Treat the ground wire as part of the setup checklist, not an afterthought reached for only once something hums. A booth deck that gets moved between gigs is exactly the kind of deck where a ground wire quietly stops being connected.
One channel has gone silent and the other one is fine
Short answer. Work backwards along the PLX-1000's signal path in the order things actually fail on a turntable: the headshell wires first, then the cartridge itself, then the phono lead. Three places, all mechanical, none of them on the top panel.
Why this happens. The four headshell wires are the thinnest connection in the whole chain and they are worked every time a cartridge or headshell is changed. A wire pulled off its pin, or a pin that has stopped gripping, silences one channel and leaves the other perfect. A cartridge can lose a coil the same way, which presents identically. This is standard turntable wiring behaviour, not anything specific to how this deck was built.
Fix it now. Turn the amplifier down and off first: "When attaching and detaching the headshell, turn off the power of the amplifier. If you attempt to do so while the volume is loud, the speaker could be damaged." Then swap in a spare headshell, which tests the wires and the cartridge together in one move. If the fault follows the headshell, it is the wiring or the cartridge. If it stays with the deck, clean the contacts before blaming anything else, "Use a soft cloth or something similar to clean the headshell terminal and then reattach it to the tone arm.", then reseat the phono lead at both ends and try the other channel on the mixer.
Avoid it next time. Carry a second headshell, already wired and balanced. It is the single most useful spare for any vinyl setup and it turns a set-ending fault into a ten second changeover.
Left and right are arriving swapped
Short answer. Left and right arriving swapped from a PLX-1000 has two places to look and only one of them is outside the deck. The manual asks whether the left and right connections for each piece of equipment are reversed, and then gives one remedy covering both halves: correctly connect the audio cable and the lead wires of the headshell part. Those lead wires are four thin colour-coded connections inside the headshell, so a cartridge fitted in a hurry or bought already mounted can invert the image with every cable in the booth correct. Nothing on the deck reports it, and it sounds like a mixer fault until you solo one side.
The needle jumps every time the bass drops
Short answer. The PLX-1000 is doing what the manual's first instruction on installation predicts when that instruction is ignored: "Place the unit on a level surface that is free of external vibration. To the extent possible, keep the unit away from the speaker system." A stylus sitting in a groove is a microphone, and it cannot tell room vibration from the vibration cut into the record. Get the deck off whatever is resonating before touching the arm.
Why this happens. Below a certain frequency the deck, the mat, the platter and the arm all start moving together with the floor or the booth structure, and the stylus climbs out of the groove. That is acoustic feedback, and the giveaway is that it happens on the loud parts and stops the moment you pull the fader down. A deck that is not level adds a constant sideways pull on top of that, which is why an unlevel deck tends to skip in one direction rather than randomly.
Fix it now. Decouple the plinth from whatever it is bolted or resting on, and move the deck away from the front of a bass cabinet if you can. Level it by turning the insulators, which suppress the effect of outside vibration and set the height, until the main unit is horizontal. Then work the manual's own list for a jumping stylus, which is five items long and only one of them is the room: stylus pressure, a warped or scratched record, dust on the stylus tip, anti-skating, and arm height. Dust gets a method rather than a shrug: "Remove the shell with cartridge and use a soft tip brush or writing brush to carefully remove dust, etc. from the stylus tip." Anti-skating is checked against the pressure number, not by feel, and arm height against the HEIGHT ADJUST table. Raising tracking force is a last resort, and it should stay inside your cartridge maker's own range.
Avoid it next time. Decide where the decks go before the room fills up, because after that nothing can be moved. A booth with the turntables bolted to the same structure as the bass bins will always fight you, and no amount of arm setup fixes a structural problem.
The stylus will not come down on the record
Short answer. A stylus that will not come down onto the record on a PLX-1000 is the arm setup rather than the arm, and the manual names two checks in an order that matters. Is the stylus pressure adjusted properly, meaning is the balance weight matched to the pressure value your cartridge asks for. And is the arm horizontally balanced, which is set by turning the balance weight until the tone arm floats level. Do the balancing check before the pressure one, because the horizontal float is the zero point the pressure scale is read from, so a pressure number set without it is a number about nothing. Because no cartridge ships with this deck, the correct pressure belongs to whatever you fitted rather than to the turntable.
The arm stops part way across and will not go on
Short answer. An arm that stops part way across a PLX-1000 and will not go on has two causes in the manual and neither of them is the bearing. Check the condition of the record, because a scratch deep enough to stall an arm will stop it in the same place every time, which is the tell. Then look around the arm and remove anything it is touching: in a working booth that is a record sleeve, a cable, a drink or the dust cover sitting where the arm needs to travel. A repeatable stall at the same groove is the record. A stall in a different place each time is something in the way.
The output is far too quiet, or far too loud
Short answer. Output from a PLX-1000 that is far too quiet or far too loud is a matching question rather than a fault: the manual asks whether the connection to the amplifier is appropriate for the cartridge type, meaning its output level, and the remedy is to connect the cables properly for it. Because no cartridge ships with this deck, that output level is entirely the owner's choice, and a low-output cartridge into a stage expecting a high-output one gives a thin quiet channel that no amount of TRIM rescues cleanly. The other direction distorts rather than disappears, which is the worse one to discover in a room.
It came in from the cold and will not play
Short answer. A PLX-1000 that has come in from the cold can refuse to play, and the manual treats it as a condition rather than a fault. Water droplets can form inside the unit when it is moved from a cold place into a warm room, or when the room temperature rises suddenly, and with condensation inside the unit will not operate properly and will not be playable. The instruction is to wait: let the unit stand for one to two hours at room temperature without turning the power on, though the time depends on how much condensation there is. Summer has its own version, from air conditioning: a unit sitting in the direct wind from an air-conditioner can do the same thing, and the answer there is to move it. So a deck that came out of a cold van and will not behave is not broken, it is early, and powering it up repeatedly does not speed anything up.
Do this. Get the deck into the room as early as you can, out of the wind from any air conditioning, and leave it alone. There is nothing to switch, and the wait is the whole fix.
What to watch for
Is there a firmware update to check on this deck
Short answer. The PLX-1000 has nothing to update on it, because there is no firmware on it at all. This is a fully analog, direct-drive turntable with no digital control path of any kind: no USB, no onboard processing, nothing a version number could attach to.
How confident this page is, and why. AlphaTheta has not issued a statement saying "no firmware exists" for this deck, and this page does not claim they have. What it can state is the structural absence: the official Help Center product page for the PLX-1000 carries no Firmware section at all, unlike the PLX-CRSS12's page, which has one, and the PLX-1000 owner's manual makes no mention of firmware anywhere in it. That absence, on both documents, is the strongest confirmation available that there is nothing here to check.
Fix it now. There is nothing to fix in this sense. If a PLX-1000 is misbehaving, the cause is mechanical: a wiring fault, a ground connection, a worn stylus, a levelling or feedback problem. Work through If something goes wrong below rather than looking for a settings menu or a version number, because neither exists on this deck.
The one reset there is. The manual gives exactly one power-cycle remedy, and it is not for firmware: "This unit may not operate properly due to static electricity or other external influences. In this case, proper operation may be restored by turning the power off, waiting 1 minute, then turning the power back on." That is the whole of it. There is no factory reset, no menu and no version to read.
Compatibility
What it works with
The mixer has to have a phono input. That is the whole PLX-1000 requirement, covered above, and it is the one that catches people moving from an all-in-one system to real turntables for the first time.
Timecode and DVS. This is a plain analog turntable with no built-in control signal of its own, so timecode vinyl works on it exactly the way it works on any turntable, and the DVS software is what decides what is supported. A worn timecode record degrades tracking long before it sounds obviously bad, which shows up as software that stutters or loses position rather than anything audibly wrong with the deck.
Mixers this site documents beside it. Any desk with switchable phono inputs works, including the DJM-900NXS2 and the DJM-450, both documented on this site with phono inputs built in.
Features explained
The motor, the torque and what drives the platter
The published figures. Drive is a servo-type direct drive, 3-phase brushless DC motor. Starting torque is 4.5 kg-cm or more. Start-up is 0.3 seconds to reach 33⅓ rpm. Wow and flutter is specified at 0.1% or less WRMS (JIS WTD).
What that means under the hands. A three-phase brushless motor with that much starting torque is what lets the deck reach full speed almost instantly rather than spinning up, which matters for scratching and for cueing accuracy: a slow, audible spin-up makes a cue point land late. Brushless also means there are no brushes to wear out, which is a large part of why direct-drive decks like this one stay in service for years of daily use.
How it stops. Pressing START/STOP a second time engages an electronic brake, which brings the platter to a smooth stop. There is no adjustment for it and none for torque: both are single fixed figures in the specifications, so a deck that feels slow to stop is dragging on something rather than set differently.
Announced. 17 July 2014, and the deck became available from late August 2014.
The three mats, and the magnet under the platter
Three separate mats ship with it. A turntable sheet, a slip mat and a slip sheet, and they are not interchangeable. On the slip mat: "If you use the mat instead of the turntable sheet, you can stop the record by hand during playing, or turn the turntable in reverse." On the slip sheet: "When the slip sheet is used under the slip mat, sliding of scratch becomes smooth." So the stack under the record is a decision, not packaging.
Do not touch the underside of the platter. The manual is explicit: "Do not touch the magnet fixing screw of the turntable (3 locations). If the fixing screw position is changed, the rated performance cannot be guaranteed." It also asks you to check the magnet before the platter goes on: "Make sure that iron powder or other dust is not adhering to the magnet on the back of the turntable."
Everything in the box. Besides the deck itself: turntable sheet, slip mat, slip sheet, dust cover, EP record adapter, balance weight, sub weight, headshell, shell weight, power cord, audio cable and ground wire. A cartridge is not among them.
The pitch fader and what its range actually does
Short answer. The PLX-1000 runs ±8%, ±16%, ±50%, with instant reset to 0%, at 33⅓ and 45 rpm, so check which range the fader is set to before you blame the deck. The same physical fader movement produces a much bigger tempo change in the wide setting than the narrow one: 0.016% per step at ±8%, 0.032% at ±16% and 0.1% at ±50%. Instant reset returns the deck to 0% regardless of where the fader is physically sitting.
Why this happens. A deck left in the widest range, ±50% on this model, feels wildly twitchy to the next person, because a millimetre of fader travel now means far more tempo change than they are used to. Reaching for the reset button first tells you immediately whether the fader is the problem or the range is.
Fix it now. Set the range you actually want, reset to 0%, then beatmatch from a known zero rather than by eye. Do not read the fader itself for that zero: "The scale of the [TEMPO] slider is a rough value. Please use it as a guide." What the deck gives you instead is four rows of strobe patterns around the platter, lit by the blue strobe illuminator: the third row stopped is the specified speed, and the other three read +7.2%, +3.3% and -3.3%. The deck reaches 0.3 seconds to reach 33⅓ rpm, which is fast enough that a slow-feeling start is almost always a torque or drag issue, not the motor.
Avoid it next time. Make the pitch range part of your setup check on any deck you did not set up yourself, the same way you would check a mixer's gain staging before a set.
What AlphaTheta publishes
The published figures. Drive servo-type direct drive, 3-phase brushless DC motor. Starting torque 4.5 kg-cm or more. Pitch range ±8%, ±16%, ±50%, with instant reset to 0%, at 33⅓ and 45 rpm. Start-up 0.3 seconds to reach 33⅓ rpm. Wow and flutter 0.1% or less WRMS (JIS WTD). Platter aluminum die-casting, 332 mm diameter. Tonearm universal-type s-shape, gimbal-supported bearing structure, static-balance type, 230 mm effective length. Output PHONO OUT (gold-plated RCA) and a SIGNAL GND terminal, no built-in phono equalizer. Dimensions 453 × 159 × 353 mm. Weight 14.6 kg. Signal to noise 70 dB (DIN-B). Braking is an electronic brake, which brings the platter to a smooth stop. Announced 17 July 2014, available from late August 2014.
The arm numbers, which decide what cartridge fits. Stylus pressure runs 0 g to 4.0 g, one scale mark per 0.1 g. Proper cartridge weight is 2.5 g to 12 g, mounting screws and nuts included, and that splits three ways: 2.5 g to 5.5 g with the shell weight fitted, 5 g to 9 g on the balance weight alone, and 8.5 g to 12 g once the sub weight is added. Arm geometry is 15 mm overhang with tracking error within 3 degrees, and arm height adjusts over a 19 mm cartridge at scale 0, rising one step per millimetre to a 25 mm cartridge at scale 6, over a 6 mm total range. The arm lifter is factory-adjusted in a range between approximately 8 mm and 13 mm.
What the pitch fader actually resolves. Step size is 0.016% per step at ±8%, 0.032% at ±16% and 0.1% at ±50%, so the wide range is not just wider, it is coarser per millimetre of travel.
No cartridge in the box. Stated plainly because it changes the buying decision: a headshell is included, a cartridge is not.
No firmware, and this is the strongest confirmation available. The official Help Center product page carries no Firmware section, and the manual makes no mention of firmware anywhere. Full reasoning is in What to watch for below.
Professional tips
Setting one up before a set
Land the ground wire before you plug the audio in. The rear panel gives you PHONO OUT and a SIGNAL GND terminal as two separate connections on purpose. Get the wire onto the mixer's ground post and tighten it while the deck is still easy to reach, because a deck that travels is a deck whose earth quietly stops being connected.
Check the channel is switched to PHONO, not LINE. Output is PHONO OUT (gold-plated RCA) and a SIGNAL GND terminal, no built-in phono equalizer, so nothing in this deck lifts the cartridge signal or applies RIAA equalization. On a line input it arrives thin, quiet and without bass, which is the sound of a routing mistake rather than of a broken deck.
Set the pitch range and hit reset before you beatmatch anything. This deck runs ±8%, ±16%, ±50%, with instant reset to 0%, at 33⅓ and 45 rpm, and a deck left in the widest setting gives you far more tempo per millimetre of travel than you are expecting. The reset to 0% tells you in one press whether the fader or the range is what feels wrong.
Carry a second headshell, already wired and balanced. The four headshell wires are the thinnest connection in the chain and the first suspect when one channel goes silent. A spare tests the wires and the cartridge in one move and turns a set-ending fault into a ten second swap.
Keep the cartridge's own spec sheet with the deck. No cartridge ships with a PLX-1000, so the tracking force and the anti-skating that go with it belong to the cartridge you chose, not to this turntable. A single number you use on every cartridge is wrong in one direction or the other every time.
Connections and setup
The output, and what it needs from a mixer
What is on the back. The rear panel gives you PHONO OUT (gold-plated RCA) and a SIGNAL GND terminal, no built-in phono equalizer. That last part is the one that catches people: there is no phono equalizer built into this deck, so the raw cartridge signal leaves it exactly as thin and quiet as it came off the record.
Why that matters. Plug this deck into a line input and you get a signal with no bass and almost no level, which sounds like a broken deck and is actually a routing mistake. It needs a mixer channel with a genuine phono input, meaning both a large amount of gain and RIAA equalization, or an outboard phono preamp ahead of a line input if the mixer has none.
The ground terminal. The SIGNAL GND terminal beside the RCA outputs is not optional wiring, and the manual says so under both of its connection diagrams: "Make sure to connect the ground wire. If the unit is not properly grounded, a power hum (humming sound) occurs." The wire itself is in the box.
The cables come off. On this deck both the power cord and the audio cable detach, so cables are not obstacles when the main unit is moved, and replacing the audio cable is an intended way to change the sound. The manual still tells you to use the supplied mains lead rather than a substitute, and to check the rating first if you are feeding it from an AC outlet on the back of another box: the deck draws 9 W.
Mounting a cartridge, because none is included
Short answer. The PLX-1000 ships with no cartridge. A headshell is included, but you supply and mount your own cartridge to it before the deck plays anything at all. Treat it as a separate item you have to bring, not an accessory in the box.
The arm it goes on. Tonearm is universal-type s-shape, gimbal-supported bearing structure, static-balance type, 230 mm effective length. A gimbal-supported, static-balance arm is the standard DJ-turntable design: it tracks reliably under real handling, including scratching and backspins, in a way a lighter hi-fi arm generally does not.
Wiring it, in the manual's words. "The lead wires of the headshell part are color-coded. Use tweezers or a similar tool to correctly connect the wires to the corresponding cartridge terminal per the indication on the cartridge." Then insert the headshell into the tone arm, keep it horizontal and tighten the lock nut.
Then set the overhang, before anything else. The target is the stylus tip 54 mm from the tone arm attachment part, set with the cartridge attaching screw against the overhang adjustment scale. Get that wrong and no amount of pressure or anti-skating work afterwards will make the arm track properly.
Do it with the amplifier off. The manual carries this as a standing rule for every headshell change, not just the first: "When attaching and detaching the headshell, turn off the power of the amplifier. If you attempt to do so while the volume is loud, the speaker could be damaged."
Avoid it next time. Keep the cartridge's spec sheet with the deck. Tracking force that is too light mistracks and skips, and force that is too heavy wears the records faster, so guessing a single number for every cartridge is the wrong move either way.
Zeroing the counterweight and setting stylus pressure
Short answer. The PLX-1000 is a static-balance arm, so the number on the pressure ring means nothing until the arm has been floated level first. Two stages, in this order, and the second one is the one people skip.
Stage one, float the arm. With the stylus cover and arm clamper off, set the ANTI SKATING dial to 0, push the lifter lever down, lift the arm off the rest and turn the balance weight until the tone arm is almost horizontal. Keep the stylus tip clear of the platter while you do it. If the arm will not come level because the cartridge is too light, the shell weight in the box is the answer; if it is too heavy, the sub weight goes on the rear shaft.
Stage two, zero the ring and dial the pressure. Return the arm to the rest and clamp it, then hold the balance weight still and turn only the stylus pressure adjustment ring until the 0 lines up with the black center line of the tone arm rear shaft, then turn the balance weight to the value your cartridge asks for. Range is 0 g to 4.0 g, one scale mark per 0.1 g, so the ring reads directly in the units your cartridge maker publishes.
Then anti-skating, to the same number. Not approximately: "Turn the [ANTI SKATING] dial to match the reference line to the same value as the cartridge stylus pressure value." The one sanctioned departure is for scratching, where the manual says "To prevent stylus jumping, adjust the scale position to match the play action."
Avoid it next time. Write down the balance weight scale position for each of your shells. The manual's own shortcut is that setting the weight back to a remembered position reproduces the pressure without re-floating the arm, which turns a five minute job into a ten second one at a strange deck.
Arm height, and the lifter above the record
Short answer. The PLX-1000 has a HEIGHT ADJUST dial and a lock ring around the arm base, and the dial is calibrated to cartridge height rather than to feel. Arm height is one of the manual's own listed causes of a skipping stylus, which is why it belongs in the setup and not in the fault hunt.
The dial reads in cartridge millimetres. The published table runs a 19 mm cartridge at scale 0, rising one step per millimetre to a 25 mm cartridge at scale 6, over a 6 mm total range. Unlock the ring, drop the stylus on a record, turn the dial until arm and record are parallel, then lock it: "After adjusting height of the arm, always turn the [HEIGHT ADJUST] lock to fix the arm."
Scratching gets its own setting. The manual does not ask for parallel in that case: "To prevent stylus jumping, use the [HEIGHT ADJUST] dial to adjust the arm height to match the play action."
The lifter is separately adjustable. The gap between record and stylus with the lever raised is factory-adjusted in a range between approximately 8 mm and 13 mm, set by a screw turned while the arm lifter is pushed down. Clockwise narrows the gap, counterclockwise widens it.
Preventive maintenance
What wears out, and what does not
The stylus is the consumable. It is the only part touching the record and it wears from the first play. A worn stylus does not announce itself: it mistracks, makes records sound duller than they are, and damages the records it plays. The life figure belongs to the cartridge you mounted, not to this deck, so use your cartridge maker's number.
The platter. Platter is aluminum die-casting, 332 mm diameter. It is aluminum die-cast, which is the standard material for a DJ-weight platter built to take repeated hand contact, backspins and scratching without deforming.
What does not wear. There is no belt, because drive is direct. There is no firmware to degrade, because there is none on this deck at all, covered above. A brushless motor has no brushes to replace, which is most of why decks like this stay in service for a long time with minimal attention.
Between sets. Keep the stylus clean, using the manual's method rather than a fingernail: "Remove the shell with cartridge and use a soft tip brush or writing brush to carefully remove dust, etc. from the stylus tip." Keep the ground wire attached, and wipe the headshell terminal when you refit it.
Cleaning it, and the one thing not to do while a record plays
Short answer. Cleaning a PLX-1000 is a soft cloth on the dust cover and cabinet, with one timing rule that has a real consequence: do not clean the dust cover while a record is playing, because static electricity could cause the tone arm to be pulled by the dust cover. Nothing else on this deck can move the arm on its own, so an arm that drifts towards the lid while you are wiping it is doing exactly what the manual describes. Clean it before the set or after it.
Moving it without the original packing
Short answer. Moving a PLX-1000 without its original packing has a documented procedure, and every step is about the parts that are not fixed down on a deck weighing over fourteen kilos. Detach the turntable sheet and the turntable itself and pack them carefully. Detach the headshell and the balance weight from the arm and pack those carefully too. Use the arm clamper to secure the tone arm, and tape it so it cannot move. Then wrap the main unit in a blanket or soft paper so the cabinet is not damaged. A heavy deck carried by its plinth with a loose platter sitting on the spindle is how bearings and arms are damaged in transit, and none of these steps needs a tool.
Safety
Amplifier off before every headshell change
Short answer. When attaching and detaching the headshell, turn off the power of the amplifier. The manual states the reason plainly: attempting it while the volume is loud can damage the speaker. This is the only stated damage warning in the PLX-1000 manual and it applies to a job DJs do casually, often mid-setup with the system already running. A cartridge swap in front of a live rig sends a full-scale thump through the phono stage and into the drivers. It costs a few seconds and it applies every time, including the time you are only checking something.
Firmware, drivers and manuals
Official downloads and documents
Go to AlphaTheta for the files themselves. We link their pages instead of hosting a copy, because a manual copied here is a snapshot of release day and theirs is the one that stays current. This deck is fully analog, so there is no firmware here to download.
Manuals. Official Pioneer DJ manual page →
Broken link? Let us know and we'll fix it.
Frequently asked questions
Quick answers
- Does it come with a cartridge?
- No. A cartridge and stylus have to be bought and fitted separately.
- Can I plug it straight into a line input?
- No. The output is PHONO OUT on gold-plated RCA with a SIGNAL GND terminal and there is no built-in phono equalizer, so it needs a phono input on the mixer or an external phono preamp.
- What cartridge weight does the arm take?
- 2.5 to 12 g including mounting screws and nuts, in three ranges: 2.5 to 5.5 g with the shell weight fitted, 5 to 9 g on the balance weight alone, and 8.5 to 12 g once the sub weight is added.
- Is the pitch fader scale accurate?
- Pioneer say the TEMPO slider scale is a rough value and should be used as a guide. The strobe is the accurate reading: with the third row of patterns stopped, the platter is at the specified speed.
- Do the cables detach?
- Both do. The power cord and the audio cable detach, and Pioneer treat replacing the audio cable as an intended way to change it rather than as a repair.
Related turntables
Commonly paired with
What you usually find beside it in working booths, from club, festival and rental installs rather than from a manufacturer document.
Pioneer DJ All brands Knowledge base FAQ and Fixes Dictionary
Keep the Emergency Card
We will email you the printable PDF so it is on your phone before the next dark booth. Occasional notes that save gigs. No spam, unsubscribe in one click.
Registering is free and counts everywhere on Save My Gig. We send a confirmation email first. Your address is stored with Brevo, our email provider. Unsubscribe any time. Privacy
Sources: AlphaTheta's own PLX-1000 operating instructions, document DRC1694F, read in full through the Help Center article that carries it, Pioneer DJ's PLX-1000 product overview and the announcement of 17 July 2014, checked 31 August 2026. Specifications theirs, priorities ours.